Few days ago, I wanted to build a static website with simple SCSS and ES6 which I can host somewhere. So I decided to setup a simple project which can convert my SCSS to CSS and ES6+ code to ES5. I decided to use Webpack 4. This article is based on this learning. Code base for this article can be found in my Github.
Topics
- Introduction
- Terminology
- Prerequisite
- Environment Setup
- Config file
- Working with HTML
- Webpack dev server
- Working with ES6+ and Typescript
- Working with SCSS and CSS
- Loading static resources
- Environment specific configurations and deployment
Introduction
At its core, webpack is a static module bundler for modern JavaScript applications. When webpack processes your application, it internally builds a dependency graph which maps every module your project needs and generates one or more bundles.
Our modern JavaScript application can have different modules and these modules can be dependent on each other. Webpack take these modules with dependency and generate bundles out of it.
Webpack 4 by default is zero config (you will experience this during the setup process). Being zero config does not mean you can not configure anything in Webpack. It is highly configurable to suit your need.
Terminology
Before we start with actual installation, we need to know some basic terminology which is involved in Webpack.
Entry
For building dependency graph Webpack need to know where it should start. From there onward it starts looking for other modules on which your root module depends. Default entry is ./src/index.js But you can set it to different module also:
module.exports = {
  entry: "./relative path/file.js",
};
Multiple entry points are also possible:
module.exports = {
  entry: {
    main: "./src/index.js",
    vendor: "./src/vendor.js",
  },
};
Output
Output config tell webpack where to write final files. Usually this is dist/ or builds/ folder. This can be named whatever you want.
const path = require("path");

module.exports = {
  entry: "./src/index.js",
  output: {
    path: path.resolve(__dirname, "dist"),
    filename: "main.bundle.js",
  },
};
In case of multiple entry points we need to edit the config to:
const path = require("path");
module.exports = {
  entry: {
    main: "./src/index.js",
    vendor: "./src/vendor.js",
  },
  output: {
    filename: "[name].bundle.js",
    path: __dirname + "/dist",
  },
};
Above configuration for output will result in two files in dist folder named as main.bundle.js and vendor.bundle.js
Loaders
Loaders allows us to transform our files for example: Transpile .ts files to .js or .scss to css. There is verity of loaders available in Webpack ecosystem like file-loader, url-loader etc.
Plugins
Plugins play very important role in Webpack configuration. Loaders are limited to converting modules from one form to another whereas plugins are responsible for Build optimization and asset management.
So this is just some basic terminology before we start with actual configuration. If you want to read more about core concepts you can refer to official page of Webpack.
Prerequisite
Before we start we need to have node installed in our machine. To check whether it is installed in your machine. Run this command:
node -v
If it does not show any version it means node is not installed.
To install node go to Node.js and download and install.
Environment Setup
Create a folder called TheNikhilK
mkdir TheNikhilK
cd TheNikhilK
Now initialize npm
npm init -y
Note: we’ve used -y to mark all questions as Yes.
After successful run you can see a package.json file in your webpack-starter root folder.

Now we will download webpack and webpack-cli from npm repository to run it. For this run and create Now we will create a src directory and index.js file inside it:
npm install webpack webpack-cli -D
mkdir src
Now create index.js within this directory

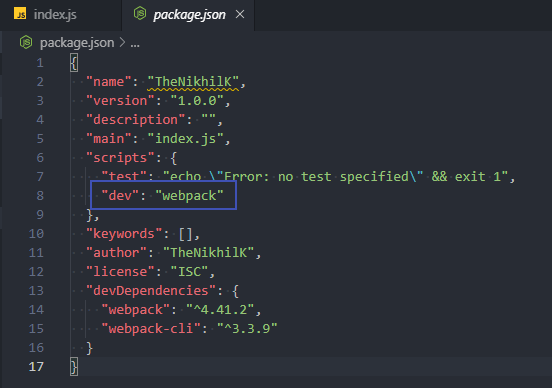
Add a npm script command to package.json
{ "dev": "webpack" }

Now run this command to run webpack
npm run dev
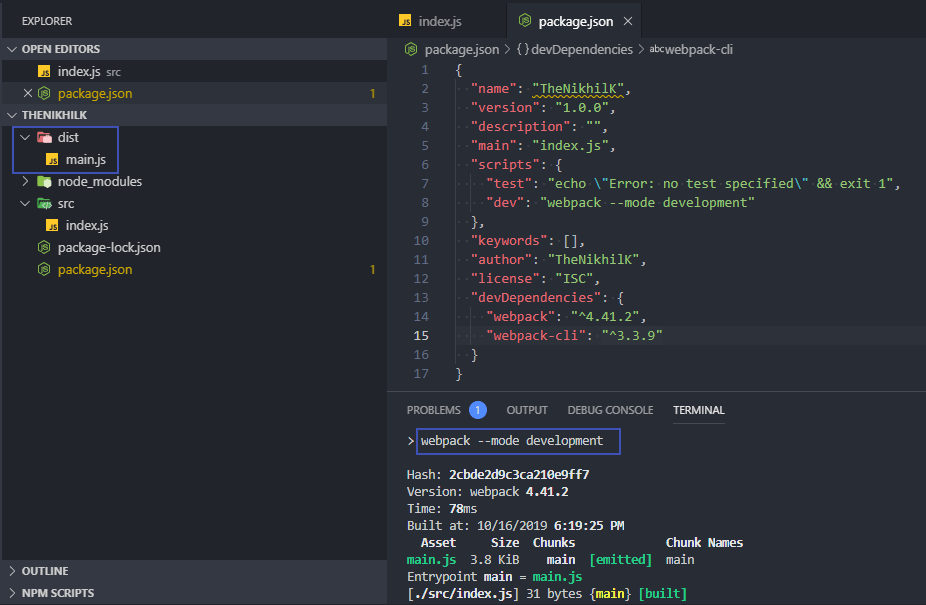
You will see a dist folder created with main.js file in your root folder. But there is a warning in console.
WARNING in configuration The 'mode' option has not been set, webpack will fallback to 'production' for this value. Set 'mode' option to 'development' or 'production' to enable defaults for each environment. You can also set it to 'none' to disable any default behavior. Learn more: https://webpack.js.org/concepts/mode/
This warning is coming because we need to set a mode. Lets do that and hit npm run dev
{ "dev": "webpack --mode development" }
Now you can see that there is no warning and chunk is generated.

How is webpack doing it? We have not configured anything.
Remember in the beginning I told you that Webpack 4 is zero configuration. Actually it is comes with default configuration which search for index.js file inside src folder and assumes that it is the entry point for building dependency graph. It also assumes that output folder is dist and emits converted files there.


