Few days ago, I wanted to build a static website with simple SCSS and ES6 which I can host somewhere. So I decided to setup a simple project which can convert my SCSS to CSS and ES6+ code to ES5. I decided to use Webpack 4. This article is based on this learning. Code base for this article can be found in my Github.
Topics
- Introduction
- Terminology
- Prerequisite
- Environment Setup
- Config file
- Working with HTML
- Webpack dev server
- Working with ES6+ and Typescript
- Working with SCSS and CSS
- Loading static resources
- Environment specific configurations and deployment
Make sure you’ve completed the basic setup at Webpack 4 Template - Setup.
Config file
We will now look into how to write our own configurations so that we can have greater control on what webpack should do.
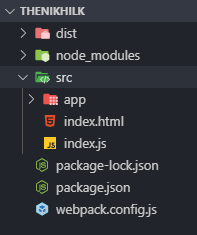
Let’s create webpack.config.js file in root directory. I have also created src/app/ directory and src/index.html file.

Now open webpack.config.js and put following code for entry and output.
const path = require("path");
module.exports = {
  entry: "./src/index.js",
  output: {
    filename: "main.js",
    path: path.resolve(__dirname, "dist"),
  },
};
Delete the dist folder from root and hit npm run dev command. You will find same result.
Working with HTML
You have noticed one thing that when we ran npm run dev it is only putting main.js file into dist folder. Webpack is not copying our index.html file.
For that we need to use html-webpack-plugin plugin.
Run the following command:
npm i html-webpack-plugin -D
Now update plugins within your webpack.config.js file.
const path = require("path");
const HtmlWebpackPlugin = require("html-webpack-plugin");

module.exports = {
  entry: "./src/index.js",
  output: {
    filename: "main.js",
    path: path.resolve(__dirname, "dist"),
  },
  plugins: [
    new HtmlWebpackPlugin({
      title: "TheNikhilK",
      template: "./src/index.html",
      inject: true,
      minify: {
        removeComments: true,
        collapseWhitespace: false,
      },
    }),
  ],
};
Update index.html file:
<!DOCTYPE html>
<html>
  <head>
    <meta charset="utf-8" />
    <meta http-equiv="X-UA-Compatible" content="IE=edge" />
    <title><%= htmlWebpackPlugin.options.title %></title>
    <meta name="viewport" content="width=device-width,initial- scale=1" />
  </head>

  <body>
    <h3>Welcome to Webpack 4 Template</h3>
  </body>
</html>
We are using htmlWebpackPlugin.options.title for adding title, which we have declared in our config file.
Now delete your dist folder and hit npm run dev command.
You will see index.html file inside dist and title is replaced by our title of config file. You will also notice that webpack has already added a script tag containing generated script main.js. You do not need to add script file manually.
If you open dist/index.html file in browser and open inspector, you will see following result.

Webpack dev server
During the development you need a mechanism to serve your files from a local server and auto reload changes to avoid refreshing browser again and again after you make any changes.
To address this Webpack has webpack-dev-server. So let’s setup our dev server.
npm i webpack-dev-server -D
Go to your package.json and update scripts
"scripts": {
    "test": "echo \"Error: no test specified\" && exit 1",
    "start": "webpack-dev-server --mode development",
    "dev": "webpack --mode development"
  }
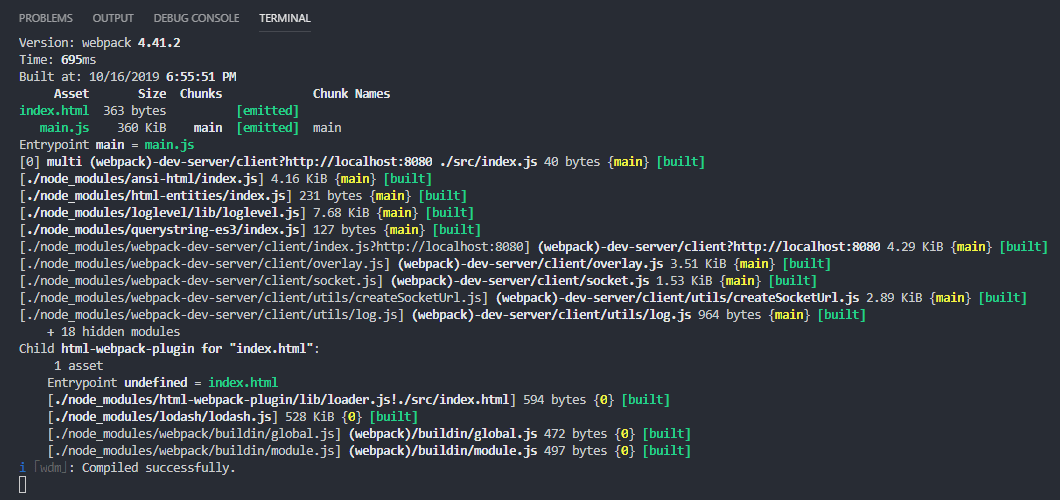
After configuring this go to root directory in terminal and run npm start command. Your terminal output should be something similar to this:

And if you go to http://localhost:8080/ you can see your welcome page. Now try changing something in /src/index.html and hit save, you can see your changes in browser without hitting refresh.
Sometimes we do not like to write extension while we import the modules. We can actually tell webpack to resolve some of the extensions if we do not write them. For that update following code in your webpack.config.js file.
const path = require("path");
const HtmlWebpackPlugin = require("html-webpack-plugin");

module.exports = {
  entry: "./src/index.js",
  output: {
    filename: "main.js",
    path: path.resolve(__dirname, "dist"),
  },
  plugins: [
    new HtmlWebpackPlugin({
      title: "TheNikhilK",
      template: "./src/index.html",
      inject: true,
      minify: {
        removeComments: true,
        collapseWhitespace: false,
      },
    }),
  ],
  resolve: {
    extensions: [".js", ".ts"],
  },
};


